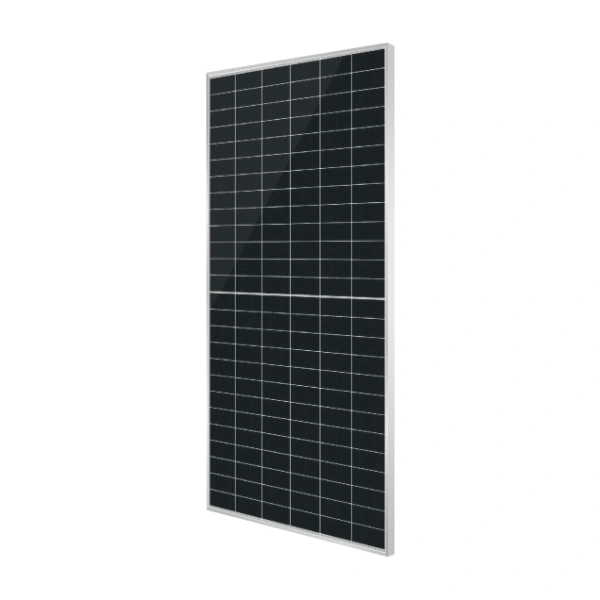
One reason I’m enthusiastic about the Hyundai 640-watt panel is that it gives us a lot of rated array power in each module. Ten Hyundai HiS-T640NJ panels add up to 6,400 watts of nameplate power. That’s a useful starting point for a Hawaii system, especially when we’re trying to fit meaningful solar production into a limited roof or ground-mount layout.
But this is a large panel, and I want to plan around that before anybody orders equipment. The current HiS-T640NJ datasheet lists a module about 97 inches long, 44.6 inches wide, and 1.2 inches thick. It weighs about 76.5 pounds. That doesn’t make it a bad roof panel. It means access, staging, and mounting deserve attention from the beginning.
Powerful on paper, practical in the real layout
Fewer modules can make the array math easier. For example, eight panels provide 5,120 watts of rated panel power, while twelve provide 7,680 watts. That does not automatically mean fewer roof attachments, less rail, less labor, or a lower project price. Those details depend on the roof shape, setbacks, orientation, structural plan, and the way the array is divided.
What the 640-watt rating does give us is a clean way to start the conversation. We can work backward from your energy goals, available roof faces, ground-mount space, and inverter limits instead of assuming that every system needs the same panel count. The price I have on these panels is excellent, and I’ll still match the current HiS-T640NJ label to the rest of the system before quoting it.
The route to the mounting area matters
With a panel this size, I want to know how it gets from delivery to its final location. We look at gates, stairs, roof access, staging space, sharp turns, overhead obstacles, and whether the mounting area can be reached without forcing people to twist or carry the module awkwardly.
The panel uses front and rear glass, so it should be handled as a large glass electrical component—not as a board that can be flexed, leaned carelessly, or dragged across a surface. The HiS-T640NJ datasheet also identifies three bypass diodes and an IP68 junction box. Those details support the panel’s construction, but they don’t remove the need for careful handling and qualified installation.
Why the bifacial feature depends on the site
This Hyundai module is bifacial, which means its rear side can collect useful light as well as its front side. The rear-side contribution depends on what the back of the panel can actually see. A raised ground mount over a light-colored surface can give the rear cells more reflected light. A panel close to a dark roof usually gives them much less.
That’s why I don’t promise one universal bifacial gain. The datasheet shows the 640-watt reference module at 672 watts with a 5% rear-side gain, 736 watts at 15%, and 800 watts at 25% under its listed test conditions. Those are modeling reference points, not a guarantee of what your roof will produce.
Those reference points also matter when we evaluate current, not just watts. The front-side 640-watt values list 13.41 amps at maximum power and 14.06 amps of short-circuit current. At the 25% rear-gain reference, those values rise to 16.76 amps and 17.58 amps. I use the appropriate operating-current and short-circuit-current values when checking the receiving inverter or charge controller; they are not interchangeable limits.
If you’re considering a ground mount, carport, or another elevated structure, the rear of the array becomes part of the design conversation. We’ll consider surface color, clearance, row spacing, shading, and how the array connects to the inverter. Bifacial is useful when the site lets the back of the panel participate; it is not a magic bonus that appears on every installation.
What TOPCon means for you
TOPCon stands for tunnel oxide passivated contact. In ordinary language, it’s an n-type cell design intended to reduce electrical losses and support strong efficiency. The HiS-T640NJ specification lists 22.9% module efficiency, along with a 30-year performance warranty that starts at 99% in the first year and then uses a 0.4% annual degradation figure to reach a guaranteed 87.4% at year 30.
Those warranty numbers are valuable because a solar array is a long-term purchase. I still want to confirm the exact HiS-T640NJ label and warranty document supplied with your order so we don’t mix this panel with a nearby Hyundai family.
Where I’d consider this panel
I’d consider the Hyundai 640-watt panel when you have enough clear mounting area, a practical route for a large module, and an inverter or charge-controller design that can accept the array’s voltage and current. I’d be especially interested in it for a spacious roof, a well-planned ground mount, or a layout where higher power per module helps us reach the target array size without turning the design into a crowded patchwork.
Bring me your roof dimensions, photos of the access route, and any inverter or battery equipment you already own. I can then check the physical fit, panel count, bifacial opportunity, string design, and current SolarMan pricing together.
For a broader visual lesson on why height, spacing, shading, and the surface behind an array matter, the Institute for Sustainable Energy Policies’ Farming meets solar power in Africa webinar is useful. The lesson discusses bifacial modules and how physical layout affects the light reaching the rear of an array. It’s a general educational lesson, but it gives you a good way to think about why bifacial performance depends on the site.