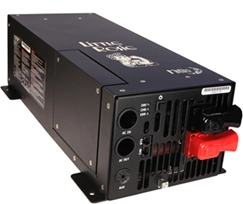
I like the MidNite Little Rosie because it gives a small 48-volt system a clear center without making the inverter carry every job by itself. The stationary MNLR4548RE provides 120-volt alternating-current (AC) power, battery charging, transfer between an incoming AC source and the loads, and control connections for a generator or other system functions. Solar charging can remain a separate job for a maximum power point tracking (MPPT) controller.
That flexibility is useful, but I don’t want to commission the system by simply turning on every breaker and hoping the settings sort themselves out. I would make the first startup a conversation between the battery, the Little Rosie, the AC source, and the solar charger.
Start with the system the Little Rosie is built for
The MNLR4548RE is a 120-volt inverter/charger for a nominal 48-volt battery system. The current owner manual lists 4,500 volt-amperes (VA) of continuous output and 6,750 watts of five-second surge. That is useful capacity for selected household circuits, a cabin, an office, or a small backup system, but it is not the same thing as saying the whole house can run every large appliance at once.
Before startup, I want to know which loads are connected and which loads are intentionally left out. A refrigerator, lighting, communications equipment, receptacles, and a modest pump may be reasonable candidates. Electric water heating, large cooking loads, and sustained air-conditioning demand need a separate conversation about battery energy, motor starting, and how long the inverter must carry them.
The battery decides how much of that rating is useful
A simple 4,500 divided by 48 estimate gives roughly 94 amps from a nominal 48-volt battery before inverter losses. That is why I look at the battery’s permitted discharge current, the battery-management-system limits if it is lithium, the cable and overcurrent protection, and the expected temperature—not just the battery’s kilowatt-hour label.
For example, a battery bank may have enough stored energy for an overnight load but still be a poor match for a large motor-starting event if its permitted current is too low. The Little Rosie’s surge capability helps, but the battery bank still has to supply the direct-current (DC) demand without excessive voltage drop or a protective shutdown.
Use the AC input as a helper, not a mystery source
The Little Rosie includes a 60-amp battery charger and a 30-amp internal transfer relay. When an approved utility or generator source is available, the inverter can pass that AC through to the loads while charging the battery. Its charger back-off function is important here: if the incoming source is already busy carrying the loads, the Little Rosie can reduce charging so the AC input is less likely to overload.
That matters on a Hawaii property using a limited generator. A generator’s nameplate rating does not mean every remaining watt automatically becomes battery charging. The generator must have room for the active loads, the Little Rosie’s charge setting must be appropriate, and the battery must be willing to accept the current. If automatic generator start is part of the plan, I also want a compatible generator with a 2-wire electric start and automatic choke, plus clear start and stop thresholds.
Keep solar charging in its own lane
The Little Rosie can work with separate MidNite MPPT charge controllers, such as the Classic, Barcelona, or Hawke’s Bay families, depending on the array and system design. That is one reason I see it fitting component-based systems: the inverter handles AC power and battery charging from an AC source, while the solar controller is selected around the array voltage, current, roof sections, and battery bank.
For the solar side, altE Store’s How to Wire Shaded Solar Panels gives a useful demonstration of how series and parallel wiring change the current reaching an MPPT controller and battery. That makes the commissioning lesson practical: a controller can show solar input while shade and array wiring still affect what the battery actually receives.
During commissioning, I would confirm that the inverter and MPPT controller agree on the battery type and charging targets. I would also verify battery monitoring, temperature compensation where applicable, and communication settings for the exact equipment being installed. A controller showing solar production does not, by itself, prove that the battery is being charged correctly.
Protection and bypass operation should be understandable
For the stationary Little Rosie, MidNite’s MNE125LR-120S E-Panel is designed specifically for this inverter. It provides a compact place for battery protection and disconnects, AC input and output breakers, a 30-amp bypass path, and a grounding busbar. I like that arrangement because a customer or service person can see the major system functions without tracing a maze of separate boxes.
That does not make the E-Panel a substitute for a model-specific installation design. The final equipment, conductor sizing, grounding, disconnects, and local requirements still need to be handled by the qualified installer. My goal is that the finished system has a clear normal path and a clear bypass path—and that everyone knows which one is being used.
Commission in stages, then test the loads
I would commission the system in stages: confirm the battery and protection equipment, power up the Little Rosie, verify the basic AC output, test the incoming AC source and transfer behavior, confirm battery charging, then bring the solar controller and generator controls into the picture. After that, I would test the actual backed-up loads one group at a time.
The Little Rosie is light at about 15 pounds and has two auxiliary input/output circuits, which gives the designer useful flexibility. But good commissioning is still about matching each function to the customer’s real system. If you’re considering a Little Rosie for a cabin, small home, office, or backup panel, bring me your battery model, generator information, solar-array plan, and the loads you want to protect. I can help determine whether the MNLR4548RE is the right center for the system before equipment is ordered.